How I wrote a custom test with Akto's Test Editor
Zero to Hero guide for writing custom YAML Tests
Table of contents
What a restaurant menu is to abstract the cooking process, APIs (Application Programming Interfaces) are to complex software applications. In the fast-paced world of software development and cybersecurity, ensuring the security of your APIs is the priority.
Akto does it all, It's an open-source, instant API security platform that takes only 60 secs to get started. Akto is used by security teams to maintain a continuous inventory of APIs, test APIs for vulnerabilities and find runtime issues. Akto offers tests for all OWASP top 10 and HackerOne Top 10 categories including BOLA, authentication, SSRF, XSS, security configurations, etc.
Akto's Test Editor
The Test Editor in Akto is a feature that allows you to create custom tests to suit your specific security needs. With this editor, you can define the criteria, filters, and validations that are critical to your API security testing process. Custom tests are immensely valuable because they let you focus on the aspects of your API that matter most.
Test Editor consists of three blocks:
Test Libraryconsisting of 100+ built-in testsYAMLtest editorSample APIreq and res to test
Writing Custom Tests in Akto
Writing a custom test in Akto involves using YAML (Yet Another Markup Language) to define the test's parameters. YAML is a human-readable data serialization format, making it easy for both technical and non-technical users to create custom tests. You can think of YAML as a way to specify the conditions for your API security tests in a structured and understandable manner.
Let's break down the steps to write a custom test in Akto:
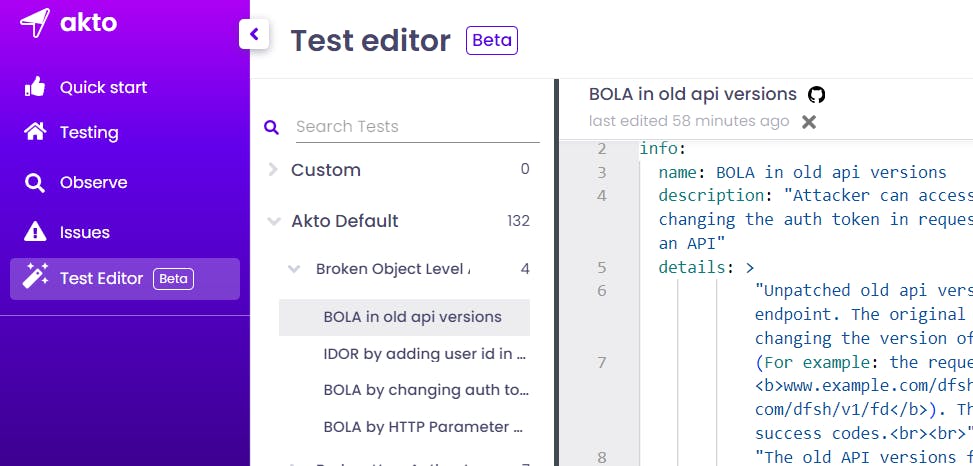
Step 0: Find the Test Editor on akto

Step 1: Define Test Information
In your custom test YAML, start by defining essential information about your test. This includes:
Test Name: Give your test a clear and descriptive name.
Description: Provide a brief overview of what your test aims to accomplish.
Details: Explain in detail the logic and rationale behind your test. Why are you testing for a specific vulnerability or condition?
Impact: Specify the potential impact of the vulnerability if exploited. This helps in understanding the severity of the issue.
Category and Sub-Category: Categorize your test to help organize and identify its purpose within your testing framework.
Severity: Indicate the severity level of the test, such as High, Medium, or Low.
Tags: Use tags to label your test and make it easier to filter and find relevant tests.
References: Include any reference links or documentation relevant to your test. This can be external resources that explain the vulnerability you are testing for.
id: CUSTOM_TEST_ID
info:
  name: "Your Test Name"
  description: "Brief description of your test."
details: >
        "Detailed description or logic behind your test."
impact: "Potential impact of the vulnerability if exploited."
category:
    name: LFI
    shortName: Local File Inclusion
    displayName: Local File Inclusion (LFI)
subCategory: CUSTOM_SUB_CATEGORY_NAME
severity: YOUR_SEVERITY_LEVEL
tags:
    - Your
    - Tags
    - Here
references:
    - "Relevant reference link"
api_selection_filters: YOUR_FILTERS_HERE
wordLists: YOUR_PAYLOADS_HERE
execute: YOUR_EXECUTION_METHOD_HERE
validate: YOUR_VALIDATION_METHOD_HERE
Step 2: API Selection Filters
The API Selection Filters section is crucial as it defines the conditions under which your test should run. This involves specifying which APIs your test should target. Here, you can filter APIs based on various parameters such as request headers, query parameters, or request bodies. For instance, you can target APIs with specific query parameters containing certain keywords or values.
An example of the same is given below:
# THIS IS API SELECTION FILTER
api_selection_filters:
  response_code:
    gte: 200
    lt: 300
  url:
    contains_either:
      - login
      - signin
      - sign-in
      - log-in
  request_payload:
    for_one:
      key:
        contains_either:
          - password
          - pwd
          - pass
          - passwd
  request_headers:
    for_one:
      key:
        contains_either: cookie
        extract: header_key
Syntax
Parent Operators - Each
conditionblock begins with a parent operator. Parent Operators indicate theproperty of the APIyou are testing. All the conditions will apply to these parent operators.Data Operators - Each Parent Operator should contain one or more
Data Operatorsthat describe the exact condition to be applied to the Parent Property.Collection Operators - These operators are useful for queries that involve individual keys and values in payloads and headers, rather than applying the condition to the entire payload as a string.
Combining Conditions using Boolean Operators - Security tests can be complex. Often, a specific test requires multiple filter conditions to evaluate whether a given endpoint is eligible for the test.
Step 3: Write Execute
The execution section outlines how your test should interact with the API under examination. You can modify request parameters, headers, or bodies to simulate potential attacks. After determining that an endpoint is eligible for a YAML Test, it is forwarded to the execution step. This section is used to describe actions/modifications to achieve the desired test request body.
execute:
  type: single
  requests:
    - req:
        - modify_query_param:
                limitKey: ${limitValue}0
The Example below might help in better understanding:
// original request body
{
  "user": "John Doe",
  "email": "johndoe@example.com"
}
execute:
    add_body_param:
        status: admin
Step 4: Validation
The validation section ensures that your test produces meaningful results. You can specify what you expect in terms of response codes, response payloads, or any other relevant data. The syntax is similar to API Selection Filters. The operators used for filtering or selecting APIs to run for testing are also used to validate whether the test attempt is vulnerable.
To avoid failed response codes, we added validation that checks if the response code is greater than or equal to 200 and less than 300. The
andthe operator ensures that bothgteandltoperators are satisfied.We also check if the length of the test response is greater than the length of the original sample response body. In the
Api Selection Filterssection above, we extracted theoriginal_lengthvariable.
# Validation Scenario
# condition 1: Response Length Should be greater than 0
# condition 2: Response Payload Should contain a key named username whose value contains substring testuser or defaultuser
# condition 3: Response Headers Should contain a value which is of url type
# All conditions are mandatory.

validate:
  response_code:
    or:
      eq: 200
      eq: 201
  response_payload:
    for_one:
      key:
        eq: user
      value:
        contains_either:
            - testuser
            - defaultuser
  response_headers:
    for_one:
      value:
        regex: https?:.*
Step 5: Complete Your Custom Test YAML
The below test is about Local File Inclusion Vulnerability in Akto.
What is Local file inclusion?

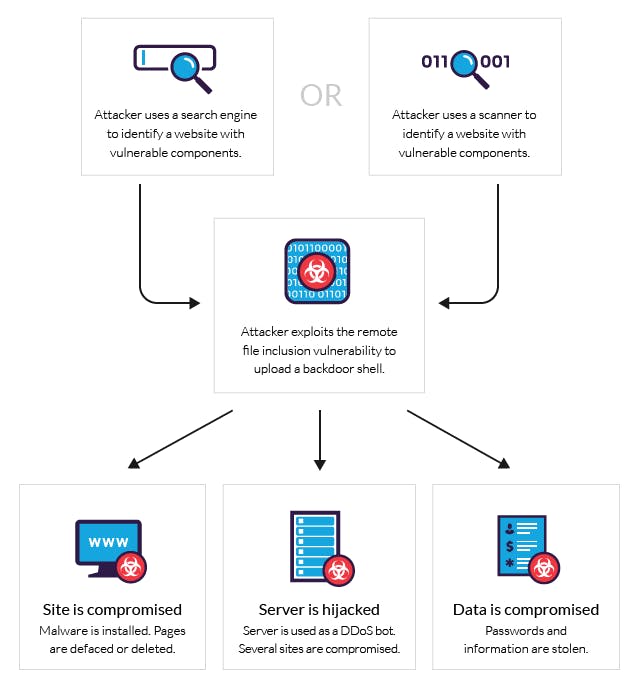
Local File Inclusion (LFI) is a vulnerability that allows an attacker to include files, usually residing on the server, within the output of a given application. LFI attacks can lead to full server compromise if configured with improper permissions. Such vulnerabilities are typically found in applications that do not properly validate user-supplied input for file inclusion functionalities.
id: LFI_BACKUP_FILES
info:
  name: "LFI via Backup Files"
  description: "Checks for accessible backup files which can be exploited for LFI."
details: >
        "Backup files, if improperly secured, can be used by attackers to extract information or compromise a server. This test attempts to access popular backup file formats."
impact: "Exposure of sensitive information and potential system compromise."
category:
    name: LFI
    shortName: Local File Inclusion
    displayName: Local File Inclusion (LFI)
subCategory: LFI_Backup_Access
severity: HIGH
tags:
    - Backup
    - Misconfiguration
references:
    - "<https://owasp.org/www-project-web-security-testing-guide/latest/4-Web_Application_Security_Testing/07-Input_Validation_Testing/11.1-Testing_for_Local_File_Inclusion>"
api_selection_filters:
  or:
    - request_payload:
        for_one:
          value:
            regex: ^.*\\..{1,4}$
          key:
            extract: backup_file_path
wordLists:
  backupFiles:
    - backup.sql
    - backup.zip
    - backup.tar.gz
    - config.php.bak
    - index.html~
execute:
  type: single
  requests:
    - req:
      - modify_request_payload:
          backup_file_path : ${backupFiles}
validate:
  response_payload:
    regex: "Sensitive_Keyword_or_Regex_Here"
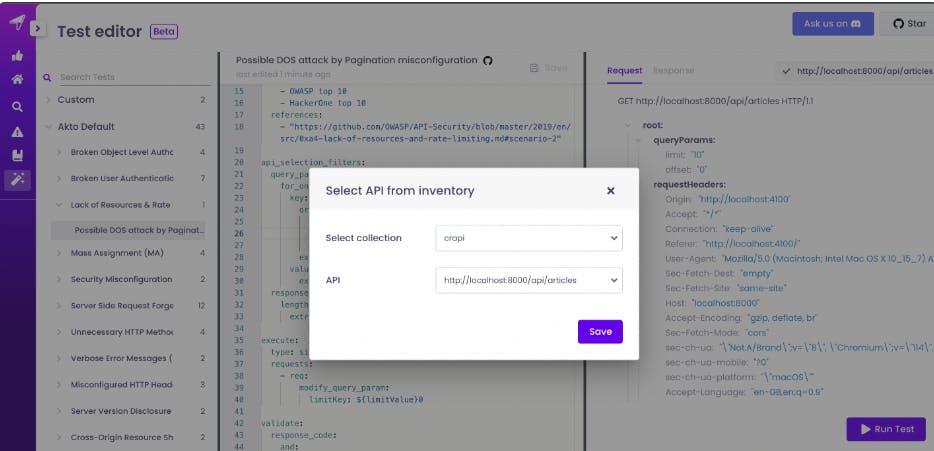
Step 6: Select your Sample API For Testing

Step 8: Run test
Now you can Validate your result and save your custom test.
Resources
Akto Quick Start - https://app.akto.io/dashboard/quick-start
Akto Documentation - https://docs.akto.io/test-editor/writing-custom-tests
Akto Tutorial to get you started - https://www.youtube.com/watch?v=4BIBra9J0Ek
Conclusion
Akto is a powerful tool that simplifies API security testing. Its Test Editor feature allows you to create custom tests tailored to your specific security needs. By writing custom tests using YAML, you gain full control over your API security testing process, ensuring that your APIs are not compromised.